“Apple” Cinnamon Muffins

apple cinnamon muffin.jpg

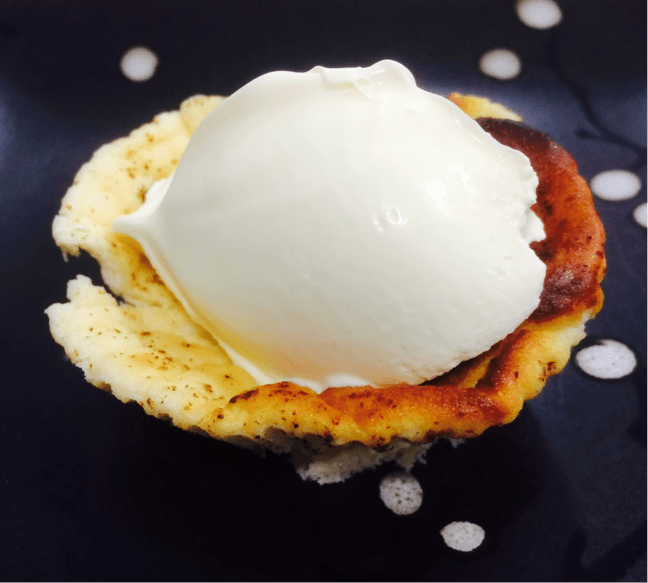
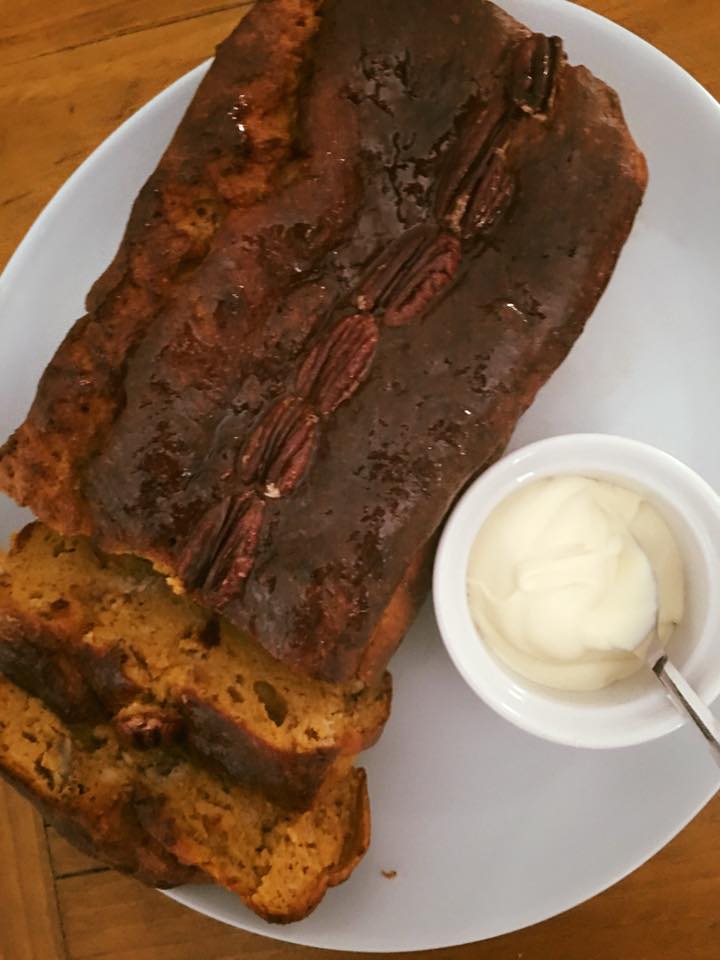
This cheeky sneaky little number uses the old Choko! An abundant vegetable in winter -is what your Granny used to trick you with when she made her apple pie – but only after she had served it up at dinner as a vegetable with lashings of butter and pepper!!

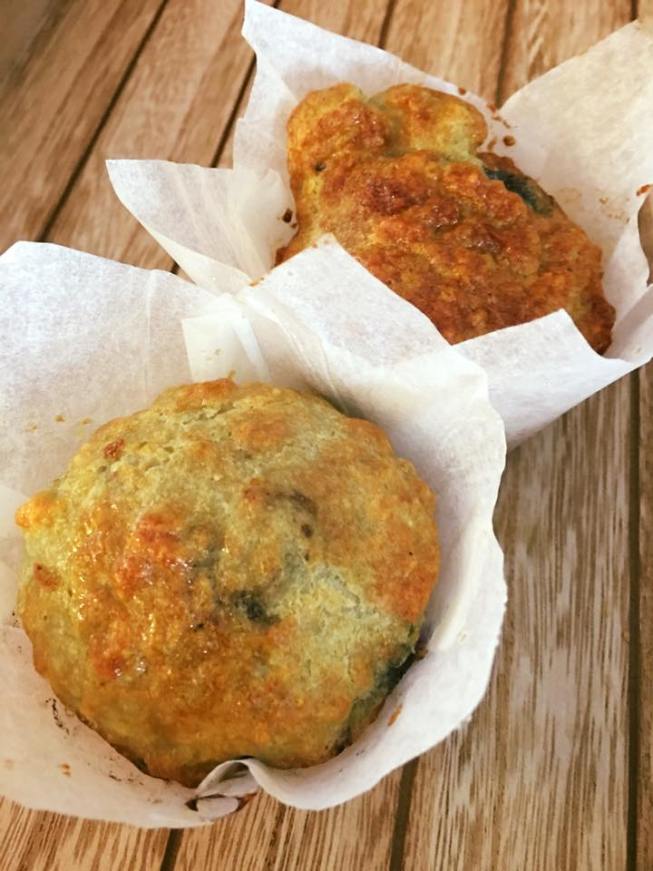
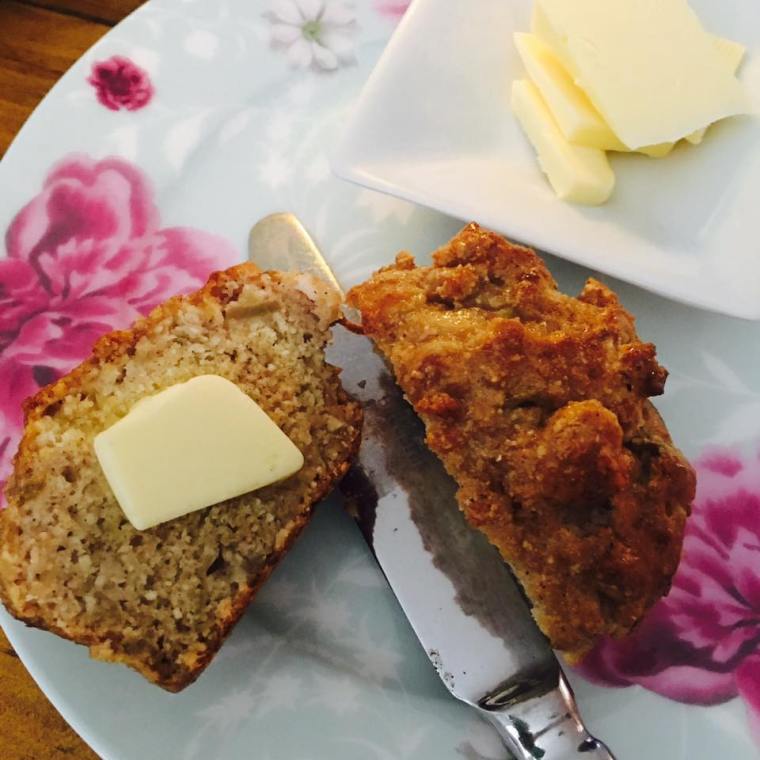
Lunchbox fillers – grab and go meals on the run.  This one is delicious warm with lashings of butter. Or on its own in your lunch box. It has a light fluffy texture but is packed with goodness that will keep you going till well after lunch. If its more fibre you’re after add a teaspoon of Psyllium Husk Powder and you’re off and racing. Its a little involved ( as all good things are never easy) but once you’ve made them – you will love them. And you will have a healthy stash in your freezer. Make big muffins or make mini to make them last longer – this is also delicious in a loaf pan for days of coffee with friends.

INGREDIENTS : (“APPLES”)

2 Large Chokos Peeled seeded and chopped into 1cm cubes

2 teaspoons of Cinnamon or Your Inspiration At Home Country Apple Pie Spice

1 Tablespoon of Raw Honey (Or Powdered Stevia if you’re being compliant to green)

50g Cultured Butter

1/3 Cup Filtered Water.

Method: “Apples”

Stew All of the above over a medium heat ( or in your thermomix – Spoon speed, 100 degrees 15 minutes) . If using a stove – pop a stick blender in and blend till small chunks in puree. Thermomix Speed 4.5 5 seconds.

INGREDIENTS: Batter

2/3 Cup Coconut Flour

1/2 Cup Unflavoured Whey Protein Isolate (available at Coles – Vanilla is fine also but watch your carb ratio on the back)

1 Teaspoon Bi Carb Soda

1 Teaspoon Apple Cider Vinegar

Method: Place into bowl Flour WPI and Baking Soda – add ACV on top of baking soda – it will fizz ( this gives your batter the lift needed to get it light and fluffy)

In a separate bowl –

Mix 4 Eggs

1 tablespoon vanilla bean paste

1 tablespoon of raw honey or pure maple syrup ( liquid sweeter if you are being compliant)

50 g Melted Coconut Oil.

MIX WET INTO DRY INGREDIENTS TO FORM BATTER – Mix Apple Mix into batter. Divide batter into 12 cup muffin tray and bake 15 -20 minutes in a moderate oven until beautifully golden.

Glaze with a little maple syrup or melted honey and butter while still warm.

NUTRITIONAL INFORMATION ( BASED ON 12 MUFFINS):

Carbs NET:7.9g  Calories:159  Protein:4.6g Fat:12.2g

French Style Baked Eggs

2016-04-25 10.10.55-1.jpg

These French Baked Eggs are and always have been a firm favourite in my household. Been making them this way for years and thank goodness they are still a treat ( they take a little time) but make a gorgeous breakfast in bed .It is baked in the oven but it is so simple and its so yummy. I hope you enjoy this twist on a French Classic.

INGREDIENTS: ( FOR ONE)

2 x Large Eggs

1 x Handful Baby Spinach

50 Ml Pouring Cream

25 G Crumbled Fetta Cheese

Salt and Pepper to taste.

METHOD:

Pop the kettle on to boil ( you’re going to need the water from it) and pre heat your oven to 160 degrees fan

Grease a ramekin with butter. Place your spinach leaves into the bottom of the ramekin. Crack your eggs onto the spinach leaves ( crack them into a cup one at a time – Mum does not want shell in her breakfast)

Pour your cream onto the eggs and spinach. And Salt and Pepper well.

Crumble your feta on top.

Pop your ramekin into a deep sided dish.

Pop your dish into the oven and pour water from your recently boiled kettle around the ramekin ( it should come half way up sides).

Close oven door and set the timer for 10 mins.  Come back and check it – If Mum likes her eggs a little runny the white should be set and the yolk will be runny. You just have to make sure your whites are set ( no one likes a runny white). It might need another 5 mins.

When its done – you can pop it onto a plate. IF you’re really clever you might like to serve it with a side of grilled asparagus spears for dipping into the egg. ( lightly grill them in a pan with a little butter while you’re waiting on the eggs to cook).

Serve with a smile and a Happy Mothers Day. And don’t forget to wash up ( also be careful getting it in and out of the oven and the water bath – use oven mitts) Mum does not want to have to fix burns.

(You can make more than one if you are feeling clever and hungry)

Spiced Non Fried Chicken

non fried chicken aioli
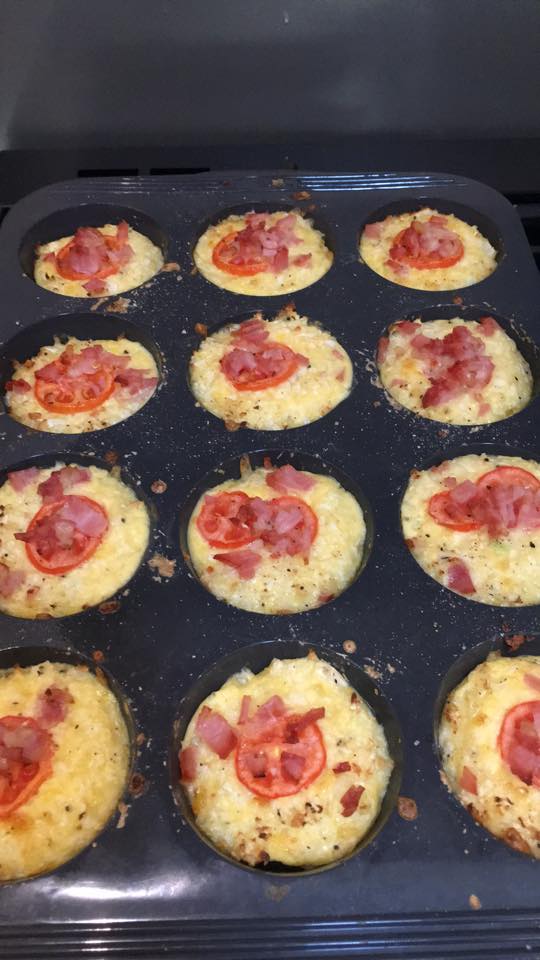
Great for a weeknight dinner – “Fake-away” night or wonderful packed cold into a picnic – these can be made mild or as spicy as you can take – I served them with a salad of baby spinach, roasted pumpkin and feta cheese. Dressed with the oil from the feta. Along side I made a pot of garlicky aioli – which I need to perfect and made in my thermomix. You don’t however need a Thermy for this – you can but almond meal already ground!

INGREDIENTS:

2 Kilos Chicken Legs ( or pieces with bone in)

250 ml buttermilk

300 g Almond Meal ( or if using a thermomix use whole almonds and mill)

1 teaspoon of garlic powder

1 teaspoon onion powder

1 teaspoon cumin powder

1 teaspoon dried thyme leaves

1 teaspoon of Sweet Smoked Paprika

1 teaspoon of chilli  flakes ( omit if you don’t want them spicy – increase if you like the heat)

Pink Salt and Ground Black Pepper to taste

2 Large Eggs.

METHOD:

Place your chicken into a glass bowl and pour buttermilk over. Seal with glad wrap and refrigerate overnight or if in a hurry a couple of hours. The enzymes in the fermented buttermilk will help tenderise your chicken and make it easier to eat off the bone.

If using a thermomix – add all of your dry ingredients into the bowl and blend Speed 9 for 5 seconds. Scrape down bowl and repeat if required ( you are looking for a nice spicy crumb)

Non Thermy – add all of your dry ingredients into a bowl and mix well. Set aside for your chicken.

Now crack two eggs and whisk them. Bring your marinated chicken out and massage the eggs through the chicken.

Glove up and press your chicken pieces into the crumb coating well. Pop them onto a lined baking tray ready to bake later.

I like to rest mine in the fridge before I cook them ( gives the crumb more time to stick) but you don’t have too if you’re in a hurry.

Bake in a moderate oven for 45-50 mins until you can see the chicken is moist and pulling away from the bone. The crumb seals in the steam and moisture so they need to sit for a little while before serving them to small people ( they get hot).

ENJOY!

NUTRITIONAL VALUE: (Based on 8 Serves per 2 Kilos of Chicken No Sides)

Calories: 98  Fat(g):7.2  Carbs:2.2  Net Carbs:1.1g Protein:7.2g

Fat Head Dough ( for Fake-away Pizzas)

pizza night.jpg

I had been wanting to play with the Fat Head Base for a while – its available if you google but I’ve converted it for thermomix and its OH SO EASY.. I made a double batch tonight after the success the other night ( we had it with De-Carbed Minestrone). EMO BOY wolfs this one down – and he is very hard to please. So you know its good.The Base itself when cut into 8 is worth 1.1 Net Grams of Carbs per slice – its  up to you what you put on the top. We are a family of meat eaters ( yes we love our pepperoni and leg ham) …

Here it is FAT HEAD PIZZA DOUGH – Thermo style..

Ingredients:

85 g Raw Almonds

170 g Shredded Mozzarella Cheese

2 Tablespoons ( 60 Grams) Cream Cheese ( I use the spreadable kind full fat from Aldi)

1 Egg

1 Clove Of Garlic

1 Sprig Of Rosemary

Pinch Pink Salt.

Method:

Mill your almonds – Speed 9.5 for 5 seconds – scrape down and repeat if required) m/c on

Remove from bowl and set aside.

Mill your garlic and rosemary, Speed 9.5 3 seconds. Scrape down and repeat if required. m/c on

Place your mozzarella and cream cheese into the bowl with the garlic and rosemary.

Gently melt Speed 3 75 degrees for approx 3 minutes. It will be stringy and melted when done. m/c on.

Pop your milled almonds and salt into the bowl. Place the egg on top of the almond mixture. Mix Speed 4 for 30 seconds m/c on.

Place a good dollop onto a piece of baking paper and cover with another piece ( if you’re clever you will get 2 good size bases out of this) gently flatten with your hand and remove top piece of baking paper.

Put into a pre heated 200 degree oven on the bottom sheet of baking paper.

Cook for approx 10 minutes, remove and top with what ever you would like and place back into oven to finish cooking for 10-15 minutes.

YUM PIZZA.

I can’t give you exact nutritional info on this one other than the base is 1.1Net Grams of Carb per serve. OF COURSE ITS GOT CALORIES.. But is barely got carbs! Enjoy

Thanks to ditch the carbs for this inspiration

Cauli Bruffins ( Breakfast Muffins)

bruffins

These little Bruffins of Yum are an absolute staple to add to your meal prep and are a great breakfast on the go or lunch box idea. Packed with all the good stuff – you can have them at home with a poached egg on top and extra bacon or if you do them in muffin papers eat them on the run. I cook mine in a silicon muffin tray – they pop out easily and pop in your mouth just as easily. I chose to top mine with fresh tomato and crumbled bacon – but they would be equally yummy with some smoked salmon and creme fraiche on top.

INGREDIENTS:

300 Grams of Riced ( but uncooked) cauliflower ( you can do this by grating or in a Thermomix or Food Processor)

3 large fresh eggs

60 g of Pure Cream

60 g of grated tasty cheese

Salt and Pepper to taste

Garnish of choice ( but crumbled bacon always works well)

METHOD:

Place your raw riced cauli into a bowl with your grated cheese.  In a seperate bowl whisk your eggs cream and seasonings. Fold eggs into cauli mixture.  Divide mix into a 12 cup muffin tray. Top with bacon and tomato if you wish.

These freeze really well and I bag them up in snack bags for my hubby to take to work on weekend. They are great hot or cold and make an excellent base for eggs benedict!

NUTRITIONAL INFORMATION: ( Per Bruffin)

150 Calories  11.4g Fats 9 Saturated 4.8g Carbs:1.4g Protein 9.6g

Baked Ricotta Cheesecake Cupcakes ( Guest Recipe)

baked-ricotta-cheesecake

A huge thank you to Member Kylie who has created these delicious and easy little morsels for you all. Im off down the street as soon as can be to grab some ingredients and give these a go!

Makes 12 cupcakes

Prep time: 7 mins, Cooking Time: 25 mins, Cooling Time: Overnight

Ingredients

  • 2 cups full fat ricotta cheese
  • 3 teaspoons of pure maple syrup
  • 1 teaspoon of vanilla extract
  • 2 eggs
  • ½ teaspoon of fresh lemon juice (optional)
  • Dusting of cinnamon for tops of cheesecakes

Method

  • Preheat fan forced oven to 180 degrees and line/grease 12 hole cupcake tray.
  • Add in a bowl the ricotta, maple syrup, vanilla and lemon juice and combine using an electric mixer.
  • Crack the eggs in a small bowl and lightly beat them. Add them to the cheese mixture, however ensure it’s a little bit at a time and ensure to mix thoroughly in between each add.
  • Once all the egg is in the mixture, keep beating the mixture using your electric mixture till your mixture is smooth and creamy, this took me about 2 minutes.
  • Divide mixture between 12 cupcake holes in your tray. Sprinkle tops with cinnamon and place in the preheated oven for 20-25 minutes, until your kebab stick comes out clean.
  • Once cooled, place the cakes in the fridge in an airtight container until cold, but preferably overnight.


Notes:

You will notice that your cupcakes will sink, this is totally normal and is perfect to serve it with a dollop of double cream (as pictured)

For the LCHF plan you can substitute the pure maple syrup for stevia or another approved sweetener. I just don’t like using those artificial ingredients in my cooking whether they are approved or not… don’t like the taste and don’t like the fact that they are processed.

Hope you enjoy this recipe as much as I did. I did get the idea of this recipe from a couple of both combined recipes from the internet and just added, subtracted and tweaked the way I wanted it too.


Nutritional Information Per Serving 

(1 cupcake without double cream and obtained from my fitness pal)

96 calories – 6.2g fat – 3.6g saturated fat – 3.8 g carbs – 5.7g protein

2 Kinds of Blueberry Muffin

blueberry-pro-muffins

Seeing as this is my third attempt at Blueberry Muffins of the LCHF Variety and the most photogenic – I will give you this recipe with the warning that it may need more moisture depending on the WPI you use. WPI and Coconut Flour have this “thing” where they drink up any liquids you add – then you add a little heat and BAM you have dry and crumbly – which these look not to be – but they are. Even the 15 Year Old Critic  has said – taste good – better than the first two – BUT DRY OH SO DRY.

Ive tweaked it a little – but it may need more coconut oil or buttermilk.

BLUEBERRY PRO-MUFFINS ( Makes 12)

1 and a half cups of Vanilla WPI ( I used TNT Brand in this available on www.thenaturaltransformer.com.)

1 Tablespoon Coconut Flour

1 teaspoon Bi Carb Soda

1 Tablespoon Apple Cider Vinegar

150 g Frozen Blueberries

250g Cultured Butter Melted

50g Coconut Oil Melted

1/2 Cup Buttermilk

4 Large Eggs Lightly whisked

1 tablespoon runny raw honey for glazing.

Place dry ingredients into a bowl. Add ACV to the bowl with Bi Carb ( it will fizz this is where you get “lift)

Melt Oil and Butter Together

Gently Whisk Eggs

Add Eggs , Berries, Oils and Buttermilk to Bowl. Mix Well ( But its a muffin so lumpy mix is good) You want it to be moist but not runny. Its a fine line with these ingredients.

Pop into a 12 cup Muffin Tray and Bake in a moderate oven for 15-20 Minutes until puffed and golden.

Lightly brush with heated runny honey to glaze straight from oven.

Enjoy with double cream or more cultured butter

NUTRITIONAL INFORMATION:

These pack a whopping 317 Calories Per Muffin

Have 20.5Grams of Fats 2.1g (1.9Net) 30.7g Protien

Want them a little more moist?

Ingredients:

1 and 1/2 Cups Vanilla WPI

2 Tablespoons Coconut Flour

100 g Crushed Macadamias

1 Teaspoon  Baking Powder

1 Tablespoon ACV

4 x Eggs

200 g Melted Cultured Butter

1/2 Cup Extra Virgin Olive Oil

150 G Frozen Blueberries.

1 tablespoon runny honey.

Follow same method as above

Nutritional Information ( Muffins take 2)

229 Calories  Fat 22.3g  Carbs 2.7g – 1.2 Net Protien:30.1g

French Provincial Chicken Casserole

FP Chicken

Makes 6 Serves..

500g Chicken Thigh Fillet Cubed

500g Chicken Breast Fillet Cubed

3 Rashers Streaky Bacon Diced

1 Large White Onion diced

2 Cloves Garlic Chopped Finely

1 Stick Celery Diced

1 Tablespoon Your Inspiration At Home French Provincial Herb Mix OR

Sprig or Two Fresh Thyme ,  Dried Oregano & Some dried lavender

2 Tablespoons Garlic Infused EVOO

Chicken Or vegetable Stock ( I use homemade)

500 Ml Water

1/2 Cup Dry White Wine

2 Tablespoons Sour Cream.

METHOD:

Sautee Chicken in batches in a heavy based saucepan in EVOO ( you may need to add more in each batch) set aside an sauté onion, garlic and bacon.

Add Chicken back into pan along with juices from resting. Add White wine , stock, water and herbs.

Simmer for up to an hour on a low heat. Add Sour cream just before serving.

Serve with Zoodles for super Low Carb – Brown Rice for Low GI.

Cinnamon Spiced Pumpkin & Pecan Loaf

pumpkin pecan loaf

This is a delicious dessert served warm or can be made in a 12 cup muffin tray and frozen and related as needed. With 6.9g of Carb per serve  this is a delicious treat. To cut the carbs even more – take out the maple. But its really really yummy with it.. Enjoy

INGREDIENTS:

400 g cooled pumpkin mashed

125g butter

1 tablespoon of cinnamon

4 eggs

1/4 cup coconut flour

1/4 cup plain WPI

1 teaspoon Xanthem Gum

2 teaspoon baking powder

1/2 cup rough chopped pecans

1 teaspoon vanilla paste (or scraped vanilla bean)

2 tablespoons pure maple syrup ( 45g in total – reserve 15 gr for glazing)

METHOD:

Steam and Mash your pumpkin with 125 g of butter and a tablespoon of cinnamon. Allow to cool.

Add all other ingredients to a seperate bowl.

Fold in your pumpkin Bake in a 12 cup muffin tray or a loaf in 45 mins in moderate oven till a skewer comes out clean

Decorate with a drizzle of maple and more pecans

Enjoy

NUTRITIONAL INFORMATION:

Calories 211 per serve  Fat 13.8g (Saturated 6.5g) Carbs 6.9g ( Net 8.4g) Protein 4,5g

Easy Zucchini HashBrowns ( makes 4-6)

zuch-hash-browns.jpg


These little gems are a breakfast/lunch or dinner staple in my household for Hubby and Myself. The recipe can change according to what is in the fridge but the base always remains the same. I own a set of “Speed Peelers” ( You may have heard Jamie Oliver Bang on about them) they are an excellent investment and allow you to Julienne or Zoodle even the hardest vegetable. If you don’t own one you can grate your zucchini but it tends to be quite wet when grated – which isn’t the texture you want for “Hash Browns”.

Ingredients:

1 Large zucchini ( Zoodled or Julienned)

1/2 a small capsicum ( red or yellow is pretty) diced finely

1/2 a small red onion diced finely

30 g haloumi cheese finely diced

2 eggs lightly beaten

1 tablespoon Almond Flour or meal

Salt and Pepper to taste

Method:

Add all ingredients to a small bowl and gently mix. Dollop into a hot fry pan ( I get 2/4 hash browns depending on size of zucchini) Cook for approx 5 minutes each size till browned ( Obviously this depends on thickness of  Hash Brown)

Serve topped with Bacon and Poached Eggs. Also amazing with poached eggs and hollandaise!